3 minutes
Since the death of my 2012 Macbook Pro (very decent ROI there— $2400 amortized over 9 years!) last January, I’ve been running QEMU/KVM exclusively for virtualization needs. There are a couple of VirtalBox VDIs, however, hanging around on my system, having little Oracle parties. Now that I’ve determined never to buy another Macbook until Apple start to machine their machines to be a little more user-serviceable… vamos a convirtilos.
Make sure all the Linux tools are installed (Debian host)
sudo apt install qemu-kvm libvirt-clients libvirt-daemon-system bridge-utils virt-manager spice-client-gtk
Make a folder to share files across VMs
mkdir ~/VM-share-files
VDI (Virtual desktop infrastructure) is the drive image most widely supported by hypervisors. There are many other from other hypervisor solutions, but VDI is VirtuxBox’s default
QCOW2 (QEMU (QuickEMUlation) Copy On Write) is the disc image file for VMs used by QEMU based hypervisors.
Convert Virtualbox VMs to QEMU/KVM — VDI to QCOW2
VirtManager (the GUI) default location for installation of *qcow VMs: /var/lib/libvirt/images. We could use this directory, or instead pull from a directory under $HOME, a directory much more likely to be under backup control. Your decision.
if [ ! -d ~/VMs ]
then
 mkdir -p ~/VMs
fi
Power off the VMs, then:
cd '~/VirtualBox VMs'
qemu-img convert -f vdi -O qcow2 centos8-4-server1.vdi ~/VMs/centos8-4-server1.qcow2
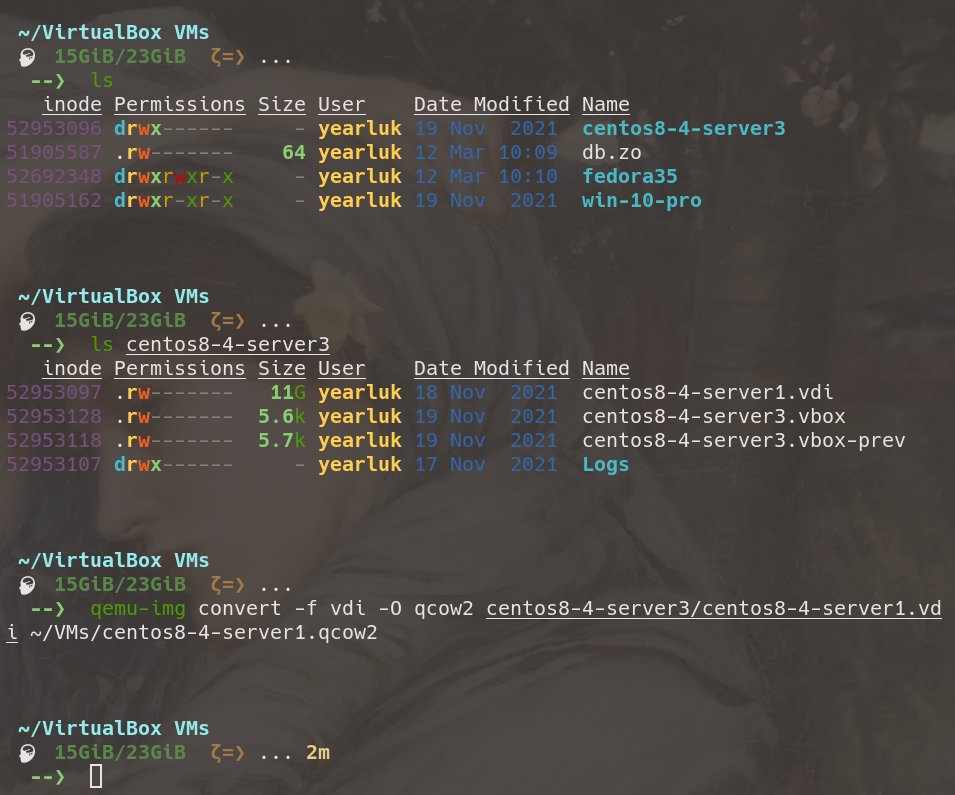
Brilliant! We have a qcow2 HDD image. Now what?
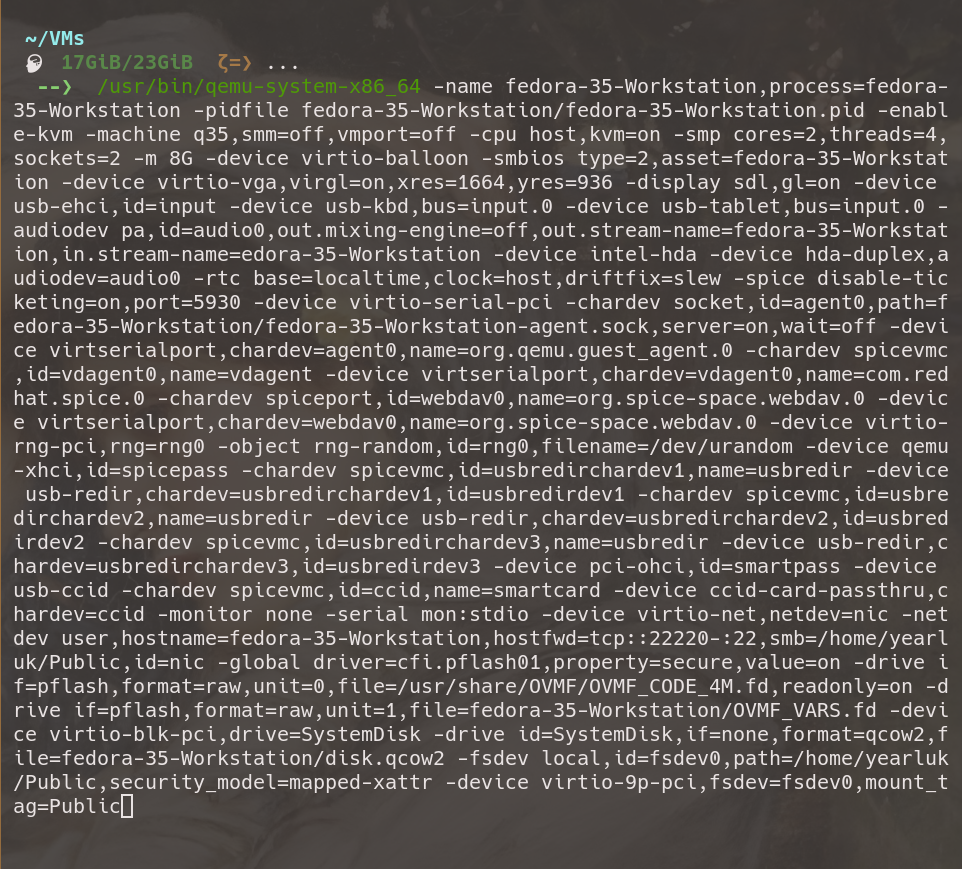
The bad news is that launching a VM from a CLI making use of this qcow2 is, err, more than a little involved. For example, here’s the command to launch a Fedora 35 qcow2 already on the system:
The good news is a quick:
virt-install --name centos8-4-server1 \
--memory 4096 \
--vcpus 4 \
--disk ~/VMs/centos8-4-server1.qcow2,bus=sata --import \
--os-variant centos8 \
--network default
virt-install --name win10-pro \
--memory 4096 \
--vcpus 4 \
--disk ~/VMs/win10-pro.qcow2,bus=sata --import \
--os-variant win10 \
--network default
--graphics spice --ram=2046
NOTE For the number of CPUs… just divide the number returned by egrep -c '(vmx|svm)' /proc/cpuinfo by so. 8 cores this is old laptop, so 4 virtual CPUs.
NOTE Available os-variants can be found by running osinfo-query os
This will launch the image in Virtviewer and register it with Virtmanager:

And in the dialog boxes here, further, more refined modifications may be made.
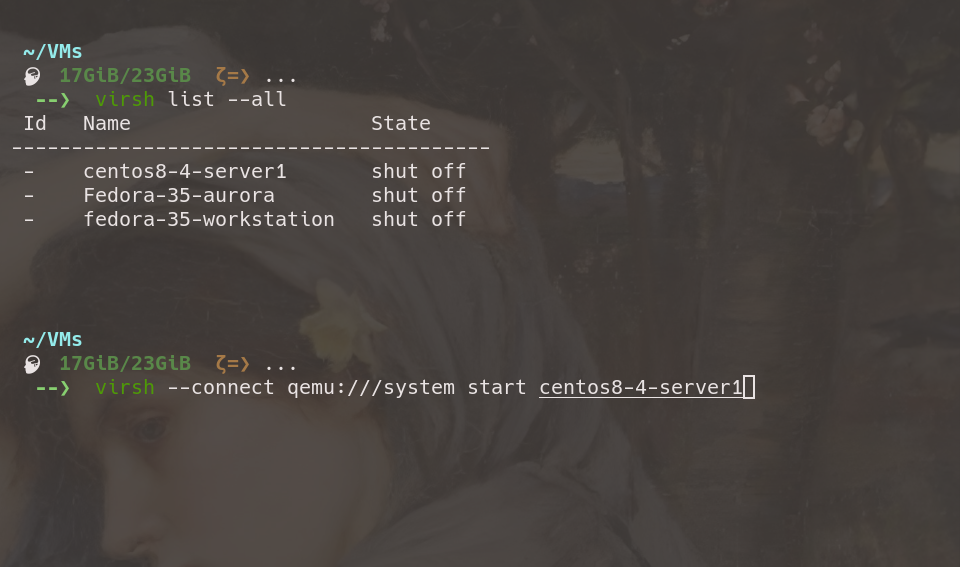
Or, modifications may be made from the CLI using virsh. Below virsh list --all and virsh --connect list and launch registered VMs:
Futher configuration
- XML configuration files for VMs are located in
/etc/libvirt/qemueven though Virtmanager does not run as root, libvert does. These files are auto-configed and should not be written to directly.
sharing files between host and VM
- host – establish ‘source’ and ‘target’ directoriesin Virtmanager:
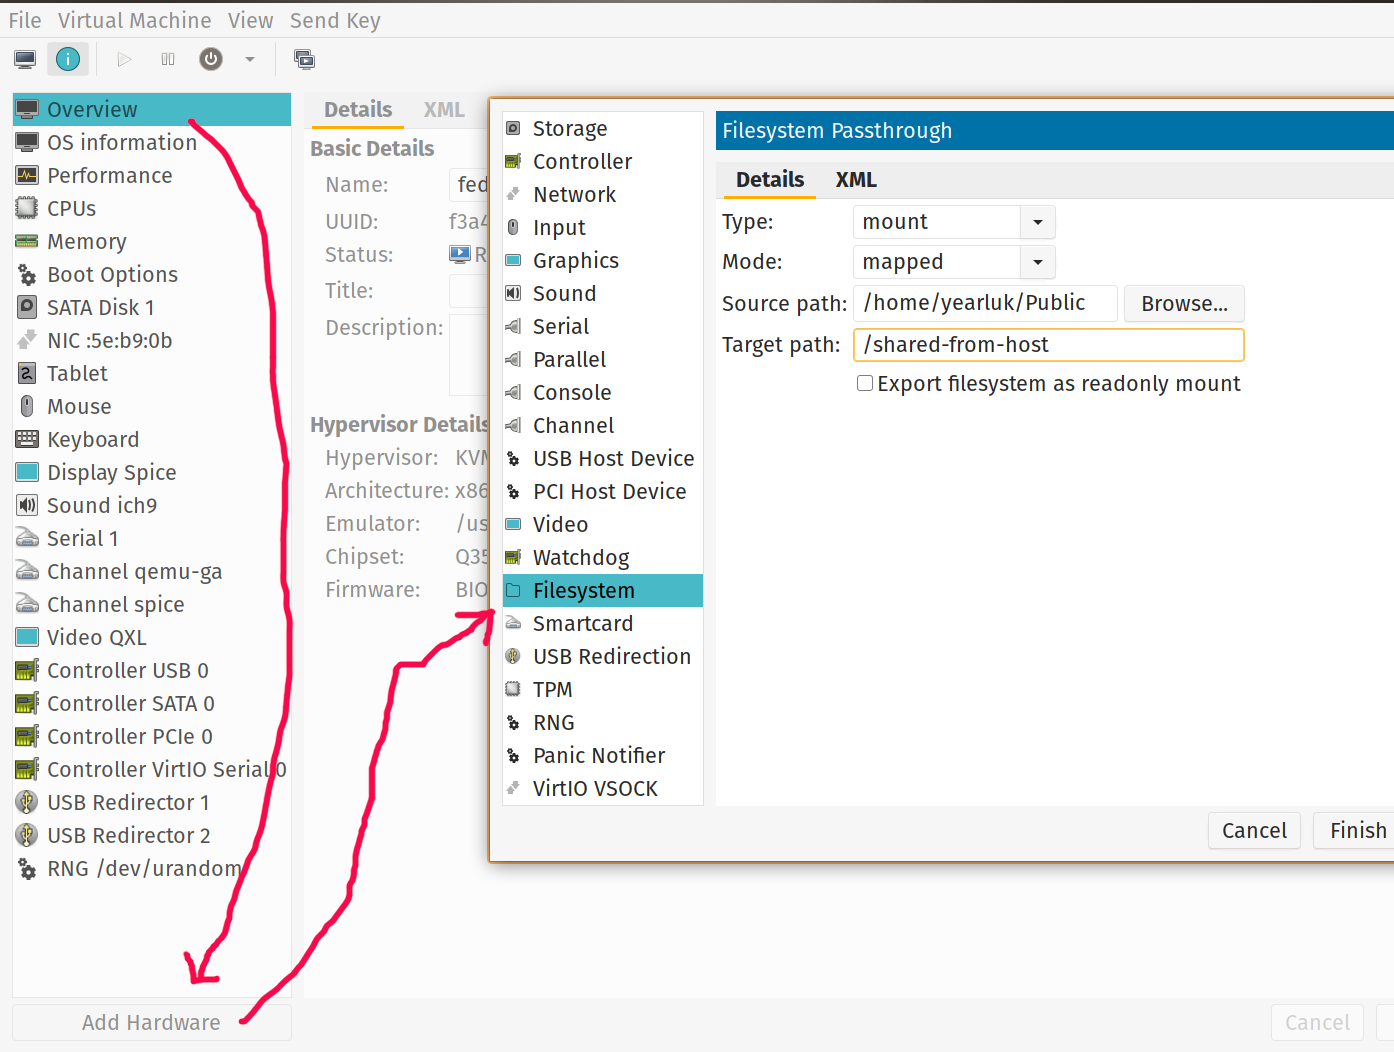
Or, maybe faster and less clicky, just shoe-horn
<filesystem type="mount" accessmode="mapped">
  <source dir="/home/yearluk/Public"/>
  <target dir="/shared-from-host"/>
  <address type='pci' domain='0x0000' bus='0x07' slot='0x00' function='0x0'/>
</filesystem>
into the relevant config file at /etc/libvirt/qemu…
virsh edit fedora-35-GNOME-devel
- On host – make a shared directory with liberal permissions:
mkdir ~/Public
chmod 777 ~/Public
- On guest – make mountpoint and mount the shared filesystem:
mkdir ~/host-share
sudo mount -t 9p -o trans=virtio /shared-from-host host-share/
- On guest – add to the
/etc/fstab:
/shared-from-host /home/salopst/host-share 9p trans=virtio,version=9p2000.L,rw 0 0
QuickEMU
A pair of shell scripts for the quick (hence the name, I guess) downloading and running of QEMU KVMs via the command line.
cd ~/VMs
git clone --depth=1 https://github.com/wimpysworld/quickemu
./quickemu/quickget fedora 35 workstation
# ./quickemu/quickget archlinux latest
# ./quickget/quickget macos monterey
./quickemu/quickemu --vm fedora-35-Workstation.conf --display-spice
# ./quickemu/quickemu --vm macos-catalina.conf -- display spice
Using this process is somewhat independent of using Virtmanager, and launches the spice viewer instead of Virtmanagers integrated viewer.
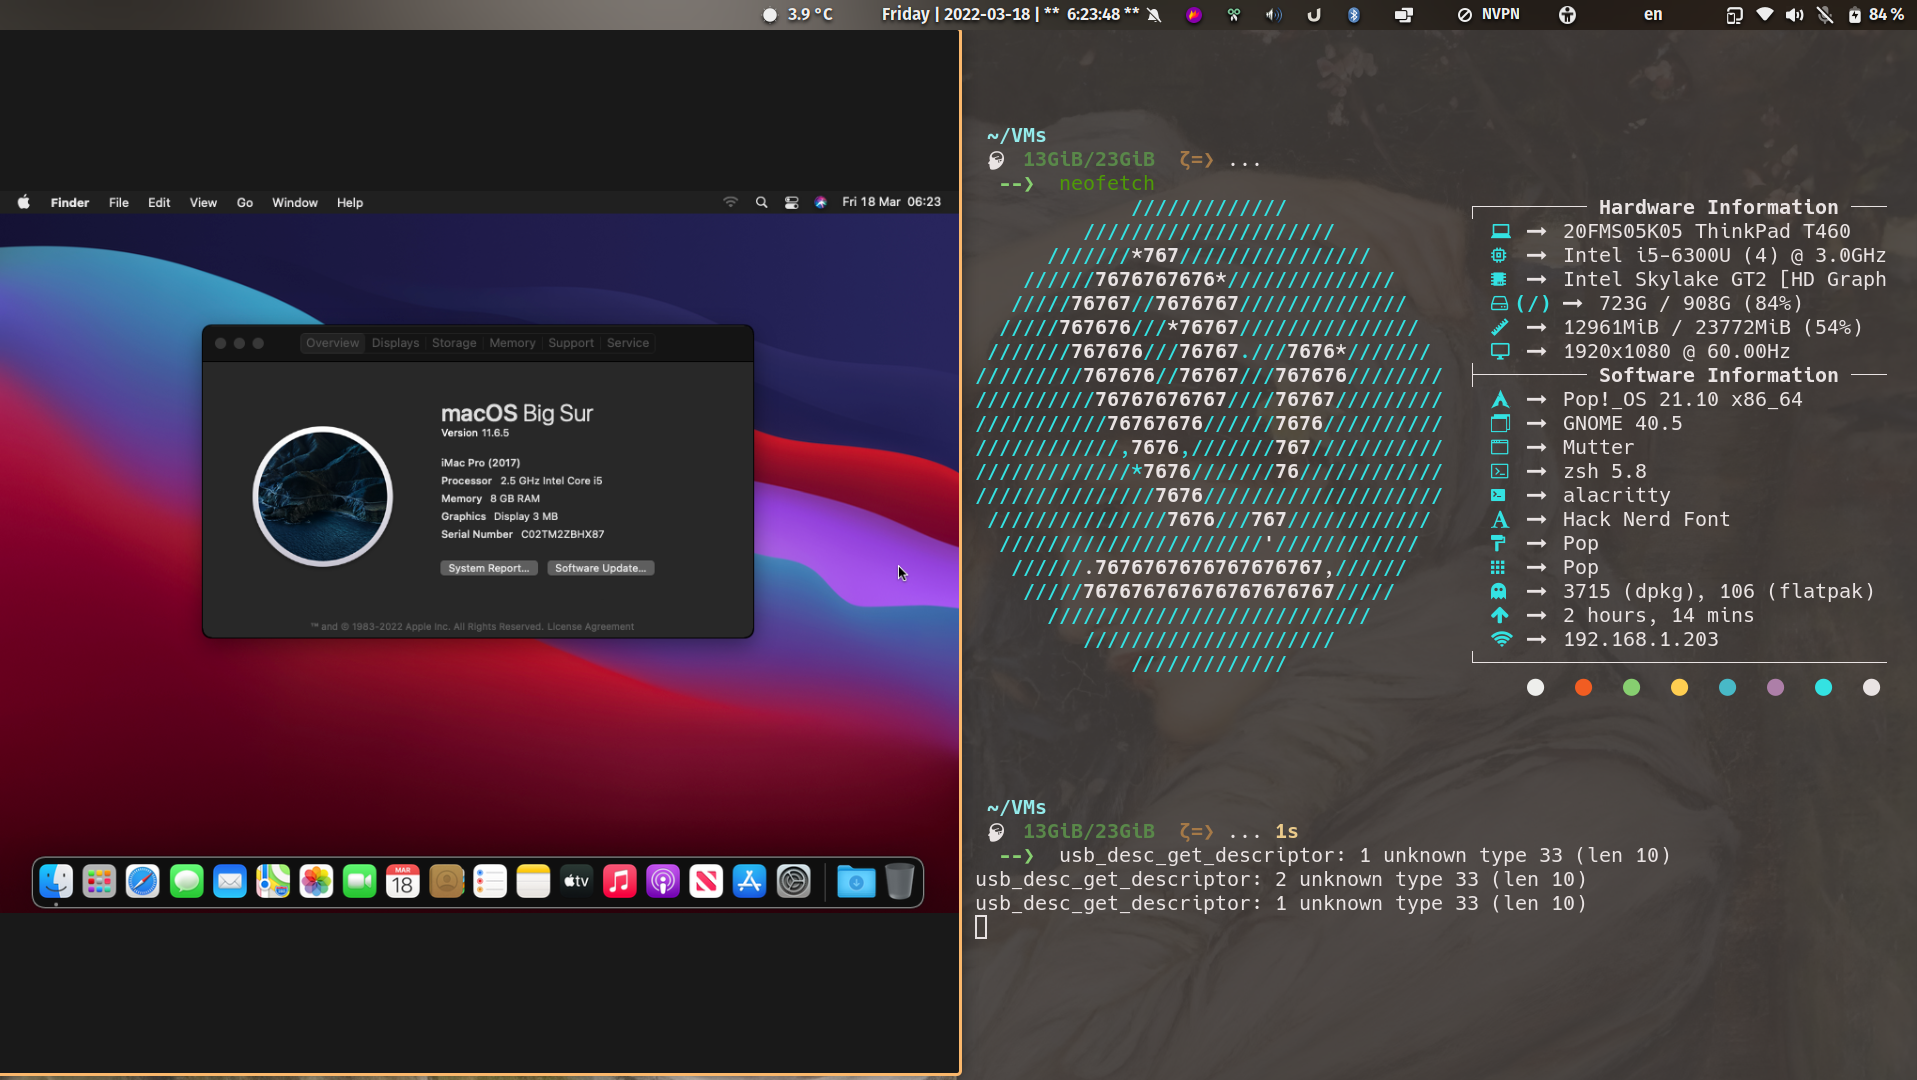
Used this process to install MacOS Big Sur. Worked like a charm… except for the install taking about three (to be fair, almost all unatended) hours.